Introduction
Sharing folders between different machines on the same network is a straightforward process that facilitates seamless access to files across multiple devices. This capability is particularly useful in collaborative environments or when transferring data between computers. In this guide, we will walk you through the steps to create a shared folder on a Windows machine, enabling you to easily share files with other users on your network. Follow the instructions below to set up and manage shared folders efficiently.
How to Create a Shared Folder on a Windows Machine
1. Using your Windows Explorer, right-click on the folder you want it to be shared between the two machines → Share with → Specific people…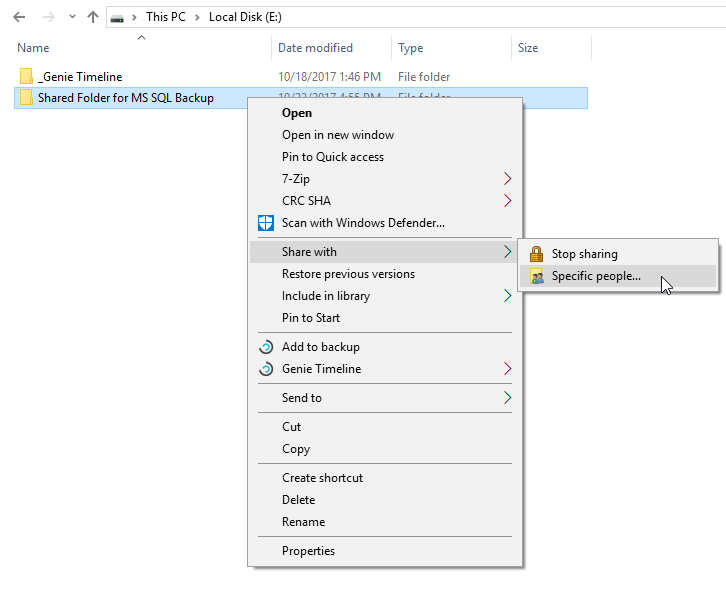
2. In the opened File Sharing window, select the user you want to share this folder with, or select Everyone → Click the Add button.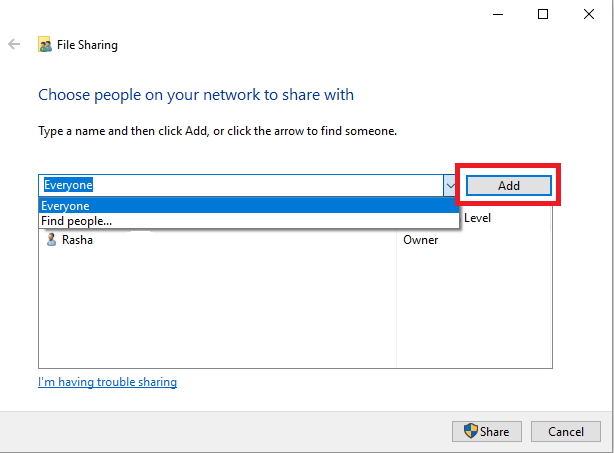
3. Give the newly added user Read/Write Permission Level → Click the Share button.
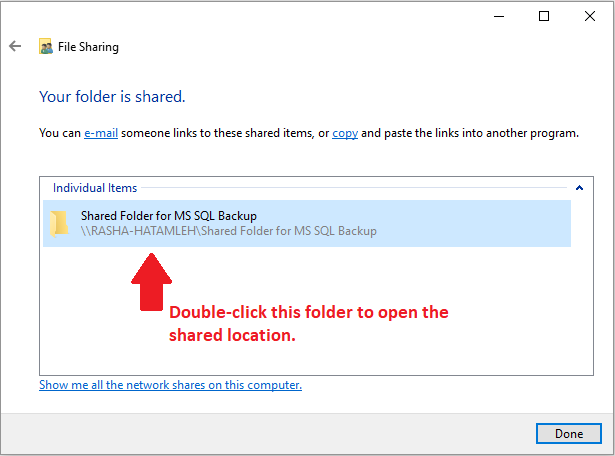
Your folder is shared! Double-click the folder name in the File Sharing window in order to open the shared location.
You can now copy the path of this shared folder to use it as you need.
