Introduction
BigMIND and GCloud Backup are premium cloud backup services offered by Genie9, designed to safeguard your digital assets. For users leveraging the GCloud Backup service to back up data from their smartphones, there is an added benefit: the ability to import GCloud backups into your BigMIND account. This integration allows for centralized management and consolidation of your data, streamlining your backup and recovery process across platforms.
How to Import Files From GCloud Backup To BigMIND
1. Sign in to your BigMIND web console.
2. From the left-side menu, click Discover.
3. From the left-side panel of the Discover Data page, click on the Add Service option.

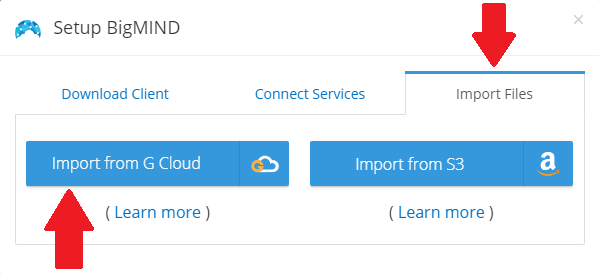
4. In the opened pop-up box, refer to the Import Files tab and click the Import from GCloud button.
5. A new Sign into GCloud Backup window will be opened. Use it to sign in to the GCloud account which you need to import the data from.

This way, the import process will start, and the following data will be imported from your GCloud account:
- Photos
- Videos
- Music files
- Documents
- Contacts
- Messages
- Call Logs

The Close option only hides the Importing Data from GCloud dialog, and the import process will continue in the background. However, the Cancel Import option cancels the importing process completely.
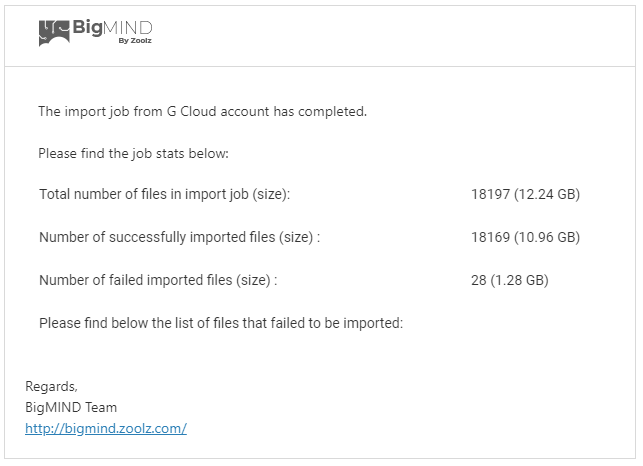
Once the import is done, an email from no-reply@zoolz.com with the subject of “G Cloud Import Finished” will be sent to you including the details shown in the screenshot below.
How to Restore Imported GCloud Data using BigMIND Restore Application
1. Open your BigMIND desktop application and click the Restore button. This will launch the BigMIND Restore application.
2. In the opened BigMIND Restore window, click the Files button.
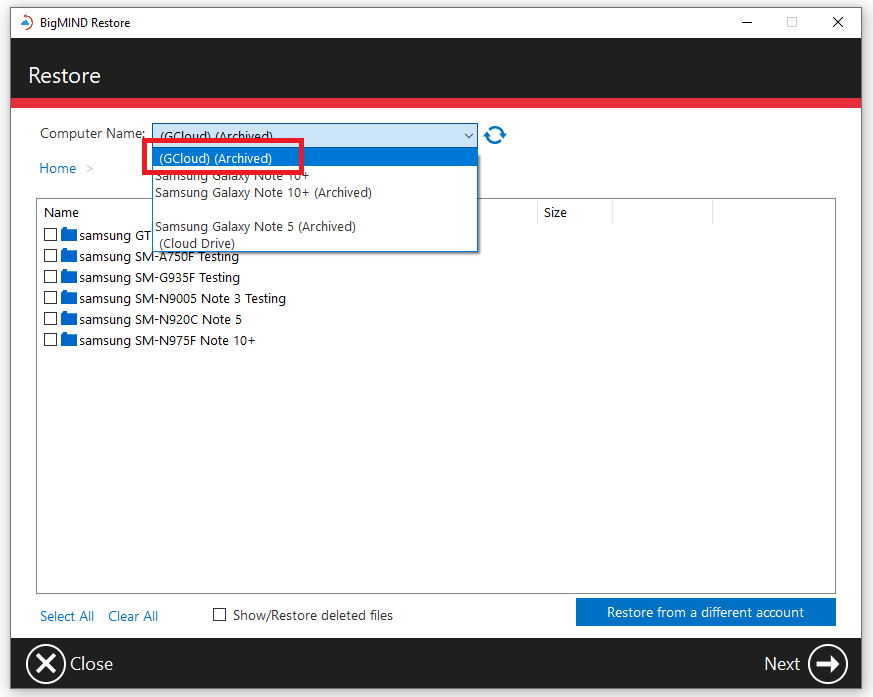
3. Select the GCloud (Archived) instance from the Computer name drop-down menu.
4. Choose the desired data from the left-side panel and transfer it to the right-side panel using the Add ![]() icon. Once selected, proceed by clicking the Next button.
icon. Once selected, proceed by clicking the Next button.
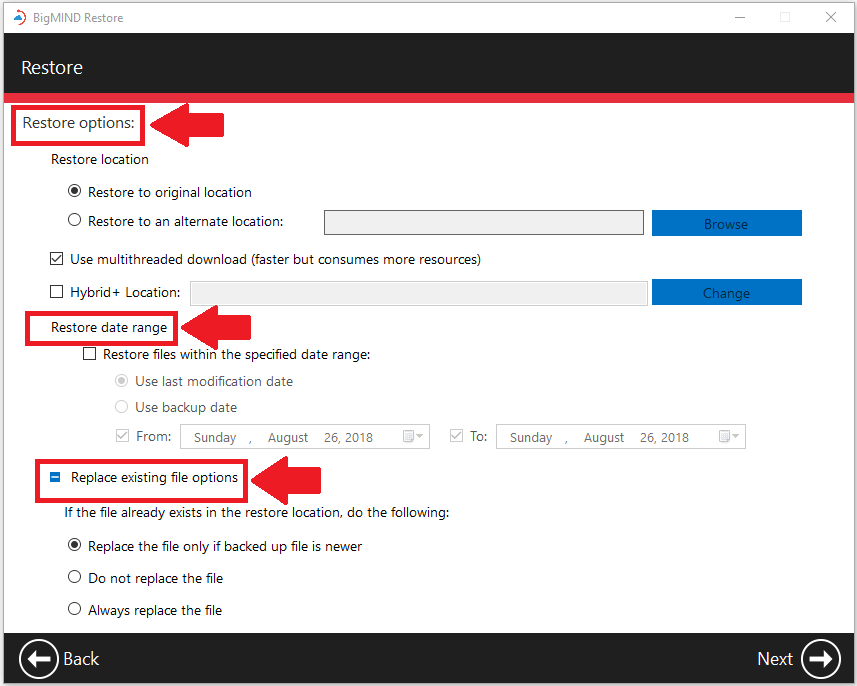
5. Specify the restore options before clicking the Next button to proceed.
During this restoration process, it is vital to maintain uninterrupted operation of your machine—avoid turning it off, logging out of your user profile, or activating sleep mode. Once files are ready and accessible, the download commences automatically. You may minimize or close the BigMIND Restore window without affecting the restoration progress.