Introduction
Database recovery is a critical aspect of maintaining data integrity and continuity in enterprise environments. Microsoft SQL Server (MS SQL) databases, widely utilized for their reliability and scalability, often require robust recovery solutions to mitigate data loss and ensure business continuity. Effective recovery processes not only restore databases to operational states but also safeguard against unforeseen data disruptions, enabling organizations to maintain productivity and meet operational commitments. This article explores the essential steps involved in:
- Restoring an MS SQL database via the BigMIND desktop application
- Download an MS SQL database via the BigMIND web console
Supported MS SQL Server Versions
MS SQL Server 2008 R2, 2012, 2014, 2016.
Restore an MS SQL Database via the BigMIND Desktop Application
BigMIND allows the user to restore the data to a newly created database, as well as restore it over an existing one. Please refer to the following steps to restore your MS SQL Database:
Step 1. Open the BigMIND desktop application on your machine → Click the Restore option on the Dashboard.
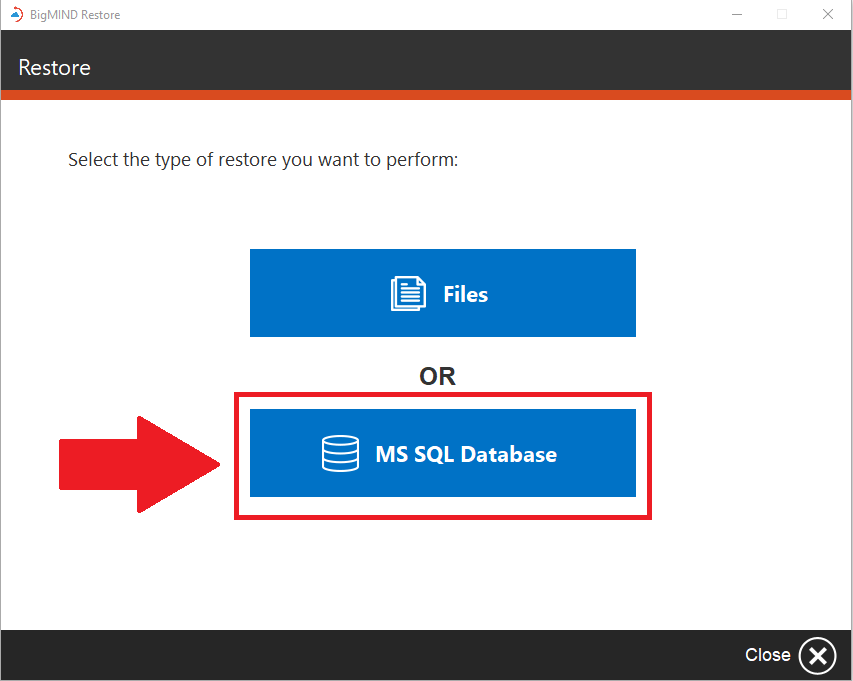
Step 2. In the Restore window, select the MS SQL Database option.
Step 3. From the list of available databases, select the database you wish to restore. You can also click the Timeline option for the selected database to select a specific date and time to restore to.

Step 4. Set the restore options as you prefer and click the Next option to start the restore.

Download an MS SQL Database via the BigMIND Web Console
BigMIND users can download the MS SQL backup for any database from their web console and import it to their Microsoft SQL Management Studio, following the steps below:
Step 1. Sign in to your BigMIND web console where the MS SQL backup is stored.
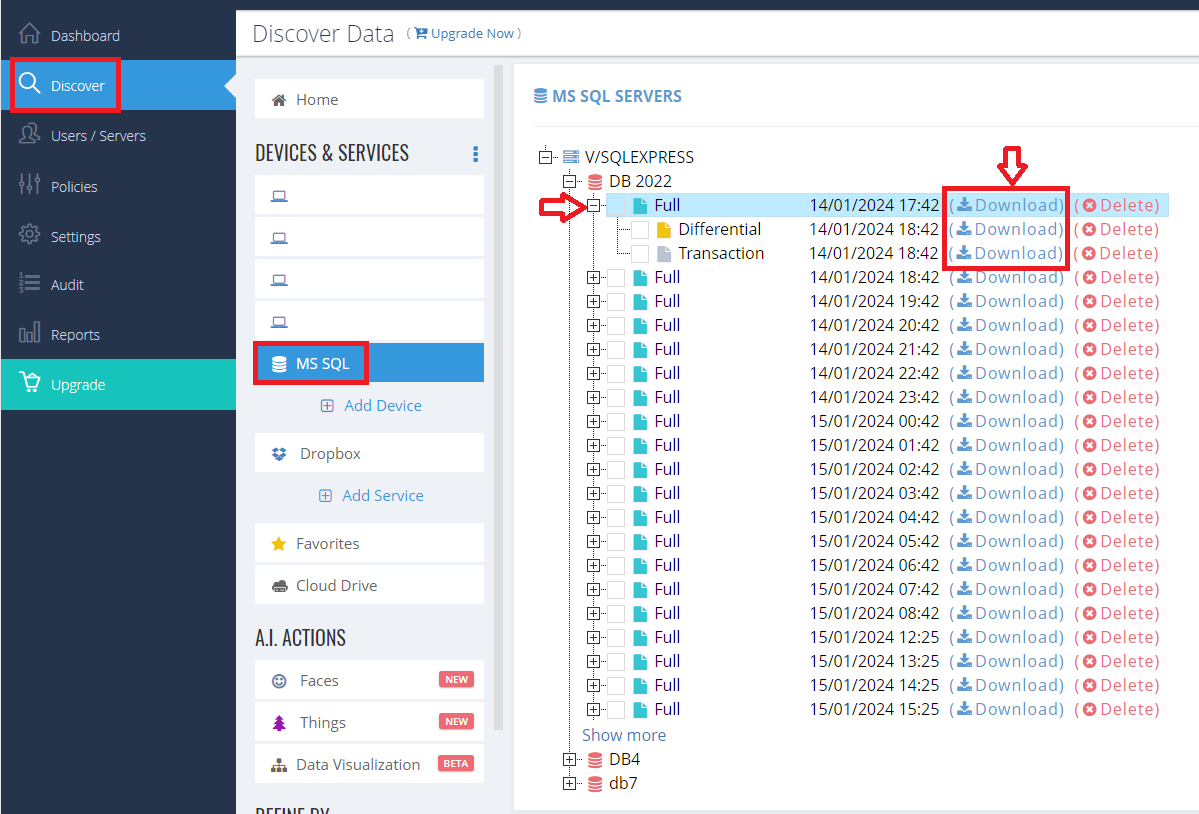
Step 2. Navigate to the Discover page.
Step 3. Locate the MS SQL button on the left-side panel of the Discover page and click on it.
Step 4. Expand the tree of the desired server by clicking the + button, then expand the tree of the desired database.
Step 5. Download the desired backup(s) by clicking the Download button next to each one. You can download Full, Differential, and Transaction Logs backups.
TIP! After downloading the MS SQL files from the Discover page, it is recommended to organize them in an easily accessible folder for smoother importation to Management Studio.
Step 6. Launch your MS SQL Management Studio.
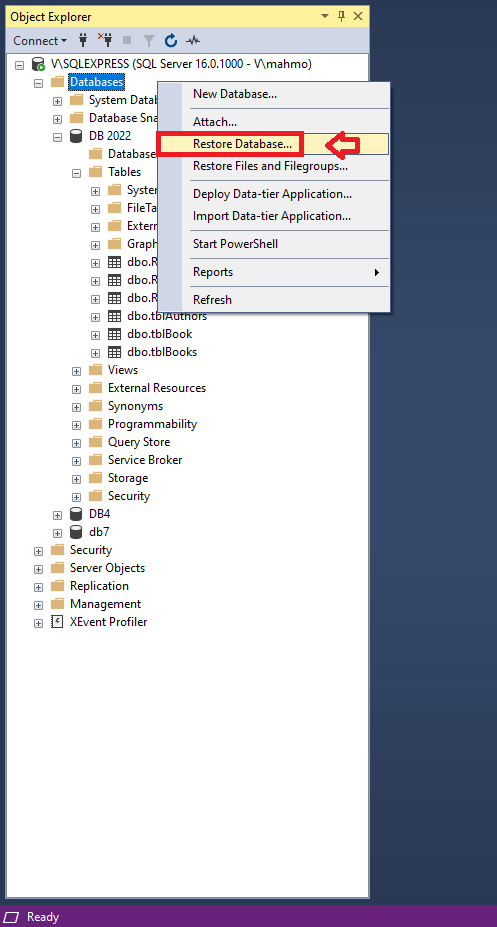
Step 7. Right-click the Databases folder on the left-side panel and choose the Restore Database.. option to open the Restore Database window.
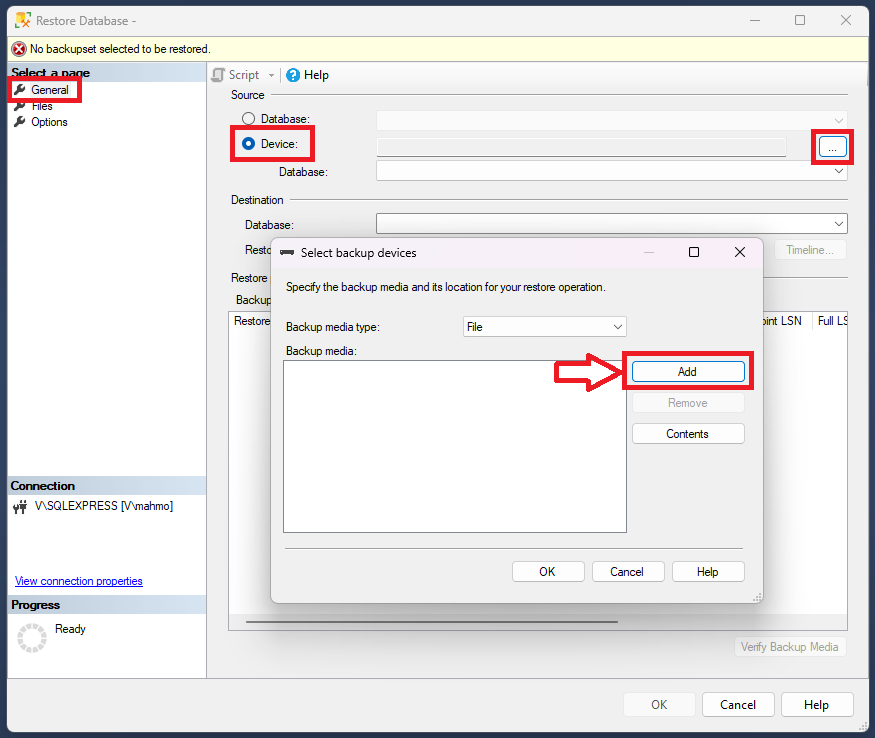
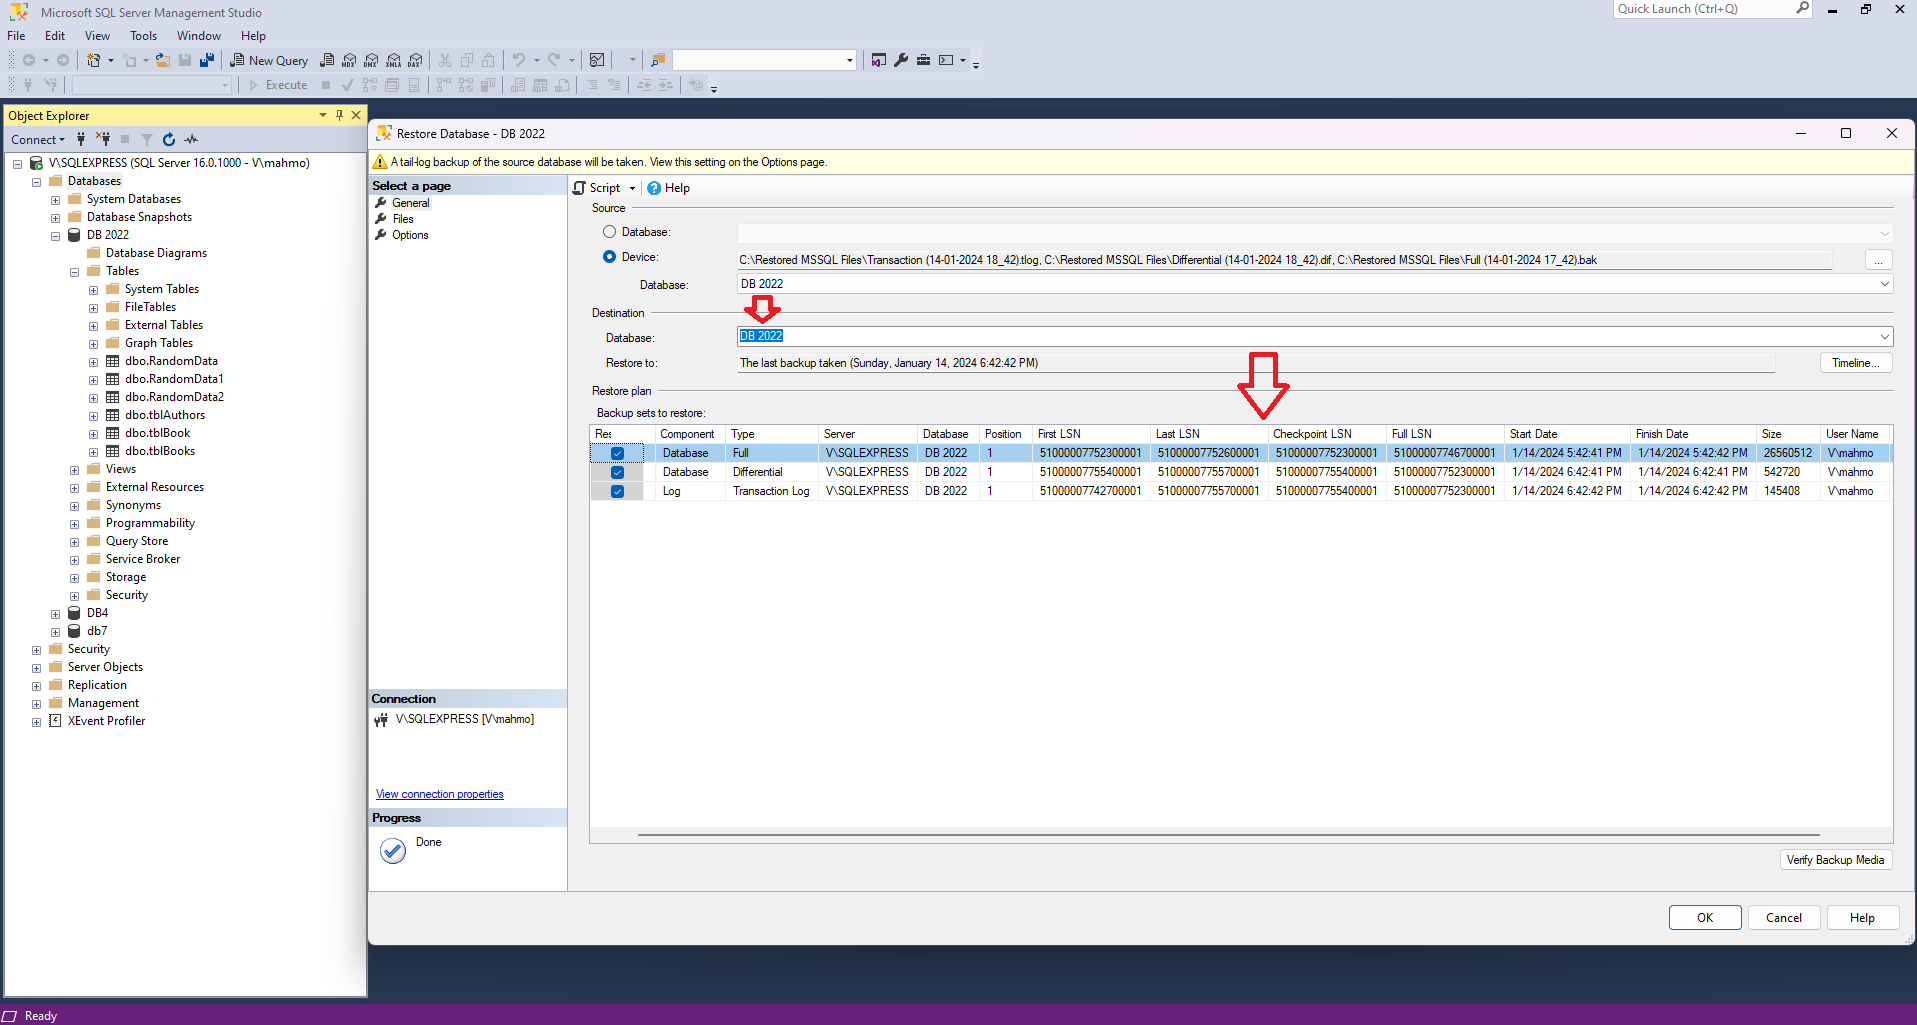
Step 8. In the Restore Database window, switch the Source to Device and click the Browse button to select the backup file.
Step 9. In the Select backup devices window, click the Add button.
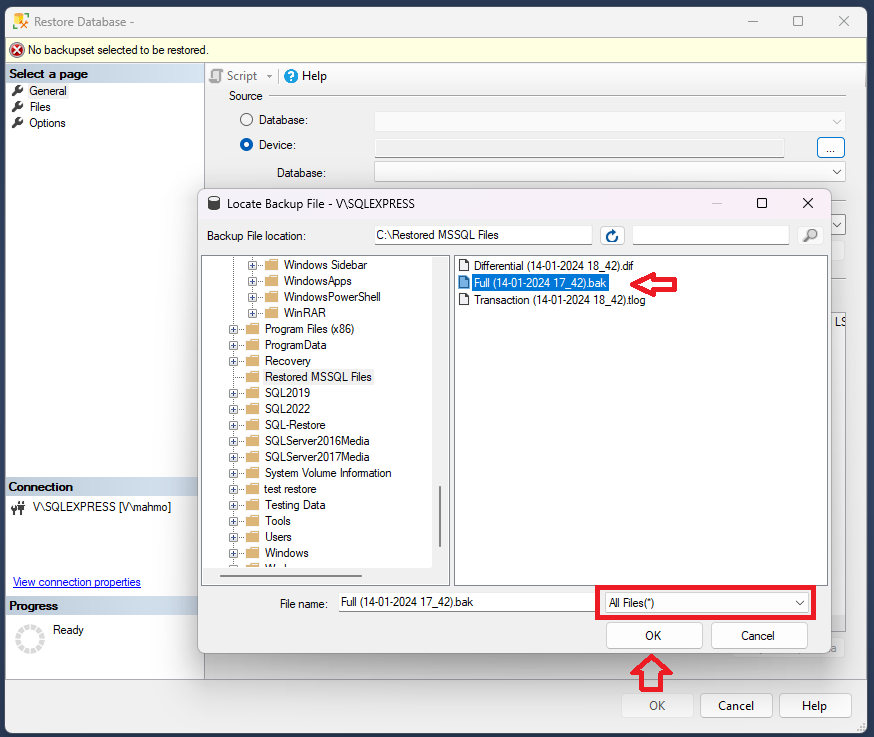
Step 10. In the opened Locate backup file window, ensure the All Files option is selected from the drop-down menu of file types at the bottom-right corner. Navigate to the folder containing the downloaded MS SQL backup, select it, and click OK.
Full backup file has the .bak extension and can be restored independently.
Differential backup file has the .dif extension and it requires both the Full and Differential files to restore a database successfully, as Differential backup cannot be restored alone.
Transaction Log backup file has the .tlog and it requires Full, Differential, and Transaction Logs to restore a database successfully.
Step 11. After selecting the desired backup file(s), a new screen will display details of the restored files and confirmation of the destination. This page includes information such as the backup date and size to be restored.
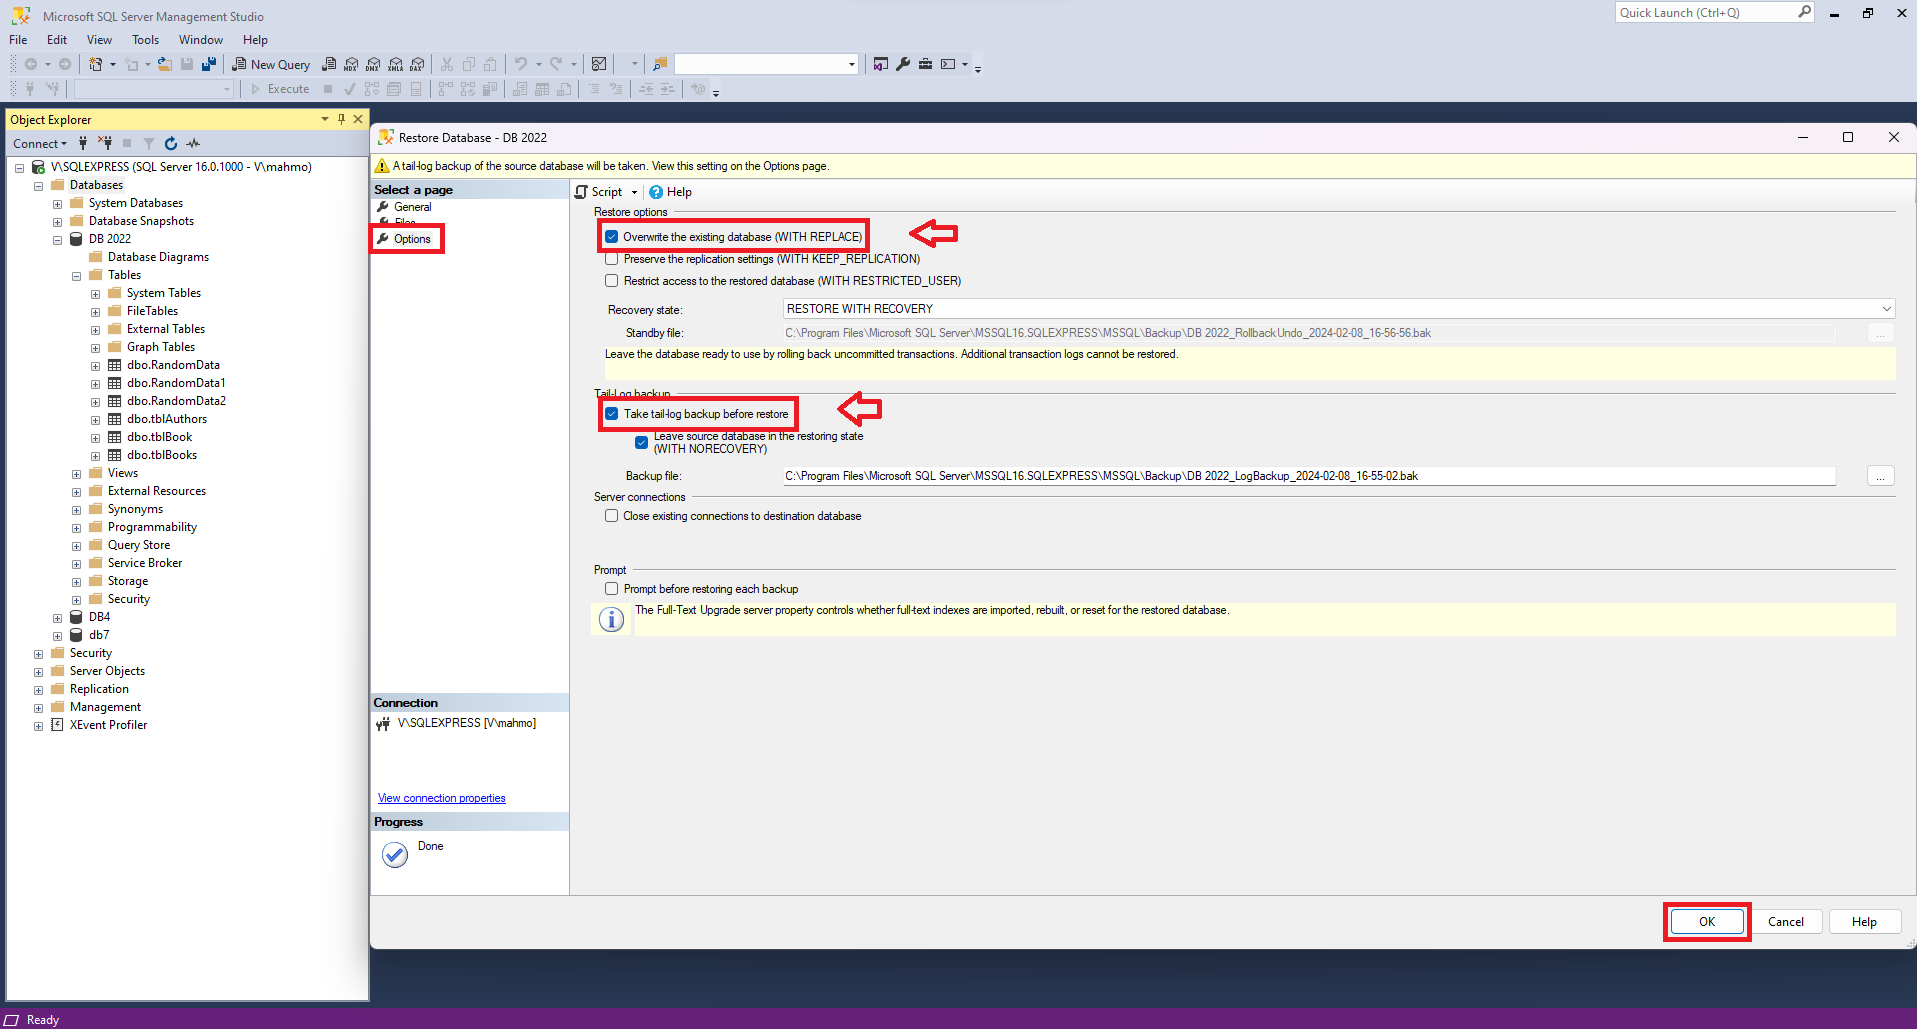
Step 12. To overwrite the existing MS SQL database, navigate to the Options section on the left-side panel of the Restore Database window. Choose the Overwrite the existing database option under the Restore options section and select Take tail-log backup before restore under the Tail-log backup section.
Step 13. Click OK to initiate the restoration process.
During the restoration process, ensure that the database you are restoring is not in use, as it cannot restore a database that is currently in use and will generate an error message.

